Carpet Removal Before Tile Installation: What Homeowners Should Know

Contents:
- Why Carpet Removal Matters So Much for a Successful Tile Job
- Carpet Removal vs. Carpet Encapsulation: A Common Point of Confusion
- The Basics: What Carpet Removal Actually Involves
- Tools You’ll See on a Job Site
- Intermediate Considerations: What Separates an Amateur Job from a Professional One
- Subfloor Type Changes Everything
- Moisture Testing Isn’t Optional in This Climate
- Adhesive Residue and Old Glue-Down Carpet
- Leveling the Subfloor
- Advanced Nuances: What Experienced Installers Watch For
- Transition Height Planning
- Crack Isolation and Movement Membranes
- Sequencing Around Cabinetry and Fixtures
- Cost Breakdown: What Carpet Removal Before Tile Actually Runs
- Common Mistakes to Avoid
- Why Tampa Bay Homeowners Choose to Have This Done Right the First Time
- Frequently Asked Questions
- Can I remove the carpet myself and just hire someone for the tile installation?
- How long does carpet removal take before tile installation can begin?
- Will removing carpet reveal problems I didn’t know I had?
- Is it more expensive to remove glue-down carpet than stretched carpet?
- Do I need a moisture test if my home is only a few years old?
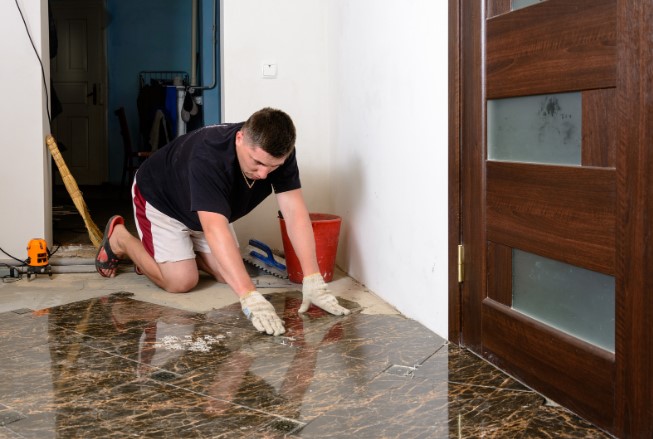
Picture this: you’ve finally saved up for the tile floor you’ve been dreaming about since you bought the house. The samples are picked, the contractor is booked, and then someone mentions the word “demo” and your stomach drops a little. What happens to the carpet that’s been sitting there for a decade? Who pulls up the tack strips, the padding, the mystery staples from three previous owners? Carpet removal before tile installation is the unglamorous first act of almost every flooring transformation in the Tampa Bay area, and how it’s handled determines whether your new tile looks flawless for twenty years or starts cracking within twenty-four months.
Homeowners tend to assume carpet removal is just ripping up a rug and hauling it to the curb. It’s not. There’s a subfloor underneath that has to be inspected, cleaned, sometimes leveled, and occasionally repaired before a single tile can be set. Skip that step, or rush it, and you’re setting yourself up for hollow-sounding tiles, uneven grout lines, and lippage that catches your sock every time you walk through the kitchen. This guide walks through everything from the basics to the details most articles skip entirely — the moisture testing, the subfloor deflection standards, the real cost ranges, and the mistakes that turn a simple job into an expensive redo.
Why Carpet Removal Matters So Much for a Successful Tile Job
Tile is unforgiving. Unlike carpet, which forgives a slightly uneven floor by simply stretching over it, tile requires a flat, stable, clean substrate or it will fail — sometimes within months. The American National Standards Institute (ANSI A108) calls for a maximum variation of 1/8 inch within a 10-foot radius for most tile installations, and 3/16 inch for large-format tile can be even stricter. Carpet, padding, tack strips, and old adhesive residue almost always violate that tolerance the moment they’re pulled up.
There’s also what’s hiding underneath that nobody thinks about until it’s too late. Pet stains that soaked into plywood subfloor. Water damage from a slow leak under a baseboard. Squeaky spots where nails have backed out over the years. None of this is visible with carpet on top, and none of it goes away just because you’ve installed tile over it — it gets worse, faster, under a rigid surface. This is exactly why professional tile installation tampa crews treat demo and subfloor prep as its own phase of the project, not an afterthought squeezed in the morning before setting tile.
Carpet Removal vs. Carpet Encapsulation: A Common Point of Confusion
A lot of homeowners ask whether they can just leave the carpet in place and install tile over it using some kind of leveling compound or backer board system — essentially “encapsulating” it instead of tearing it out. This gets confused with legitimate floating floor systems that sit over existing hard flooring. The two are not the same thing, and the confusion causes real problems.
Carpet is a soft, compressible material with fibers that trap moisture and organic matter. It cannot serve as a stable substrate for a rigid material like ceramic or porcelain tile, no matter how much leveling compound gets poured on top. Compare that to installing tile over an existing hard surface like vinyl or old tile — in that scenario, under the right conditions, an installer might be able to tile directly over it after proper prep. Carpet removal is never optional. Every reputable installer, including the team at tampa bay floors, will tell you the same thing: carpet, padding, and tack strips have to go, full stop, before tile work begins.
The Basics: What Carpet Removal Actually Involves
For homeowners who have never watched a demo crew work, here’s the sequence in plain terms.
- Furniture and baseboard removal. Rooms get cleared, and baseboards are typically pulled (carefully, for reuse) so the carpet can be removed cleanly to the wall edge.
- Cutting and pulling the carpet. Installers cut carpet into manageable strips, usually 3 to 4 feet wide, and roll them up for disposal. A standard 12×12 bedroom takes an experienced two-person crew roughly 20 to 40 minutes just for this step.
- Padding removal. Padding is usually stapled down every few inches and has to be scraped and pulled separately. It’s often more time-consuming than the carpet itself because it disintegrates and leaves debris behind.
- Tack strip and staple removal. This is the part that trips up DIYers. Hundreds of small staples and dozens of nail-studded tack strips line the perimeter of every room, and each one needs to be pried up and removed — not just knocked flat.
- Subfloor inspection. Once bare, the subfloor gets checked for moisture, soft spots, squeaks, adhesive residue, and level.
- Disposal. Carpet and padding are bulky and heavy. A single room can generate 100+ pounds of debris, and most municipal trash pickup won’t take large carpet rolls without special arrangement.
Tools You’ll See on a Job Site
Even a basic removal calls for a utility knife, pliers or a tack strip puller, a flathead pry bar, a floor scraper for stubborn staples, knee pads (trust me, you’ll want them), and a shop vacuum rated for fine debris. Anyone attempting this themselves should also budget for a staple magnet sweep — missed staples are one of the most common causes of punctured feet and torn work gloves on a job site.
Intermediate Considerations: What Separates an Amateur Job from a Professional One
This is where things get more nuanced, and where most homeowner research online stops short.
Subfloor Type Changes Everything
Florida homes generally fall into two categories: slab-on-grade construction with a concrete subfloor, or elevated construction with plywood or OSB over joists. Tampa Bay’s housing stock, especially in neighborhoods built from the 1970s through the 2000s, is overwhelmingly slab construction. That’s actually good news for tile — concrete is naturally rigid and, once cleaned and leveled, makes an excellent substrate. Plywood subfloors need more engineering: they must meet a maximum deflection of L/360 under live load (a common industry benchmark meaning the floor shouldn’t flex more than 1/360th of the span under weight), or the tile risks cracking from movement.
Moisture Testing Isn’t Optional in This Climate
Florida’s humidity and water table make moisture testing a genuinely important step that a lot of budget installers skip. Concrete slabs can hold residual moisture for years, especially in older homes without a proper vapor barrier underneath. A calcium chloride test or a relative humidity probe test (per ASTM F2170) tells you whether the slab is dry enough for adhesive-set tile, or whether a moisture mitigation membrane is needed first. Setting tile on a slab that’s still releasing vapor causes adhesive failure and, eventually, tile that pops loose — sometimes not for a year or two, which is exactly the kind of delayed failure that makes homeowners think it was a fluke rather than a prep error.
Adhesive Residue and Old Glue-Down Carpet
Older Tampa Bay homes sometimes have carpet that was glued directly to the concrete rather than stretched over tack strips and padding. This is far more labor-intensive to remove. Glue-down carpet removal often requires mechanical scraping equipment, sometimes a walk-behind scraper machine, and in stubborn cases a light shot-blasting pass to fully clear the residue. Leftover adhesive residue is one of the top reasons tile fails to bond properly, because it creates an inconsistent surface that thinset can’t grip evenly.
Leveling the Subfloor
Once the substrate is clean, it almost always needs some degree of leveling. Self-leveling underlayment compound is poured to fill low spots and achieve that 1/8-inch-per-10-foot tolerance mentioned earlier. Skipping this step is one of the single biggest contributors to lippage — the term for when adjacent tile edges sit at slightly different heights, which is both a tripping hazard and a visual flaw that ruins the look of an otherwise beautiful tile job.
Advanced Nuances: What Experienced Installers Watch For
At the higher end of the craft, a few details separate a merely acceptable job from one that lasts decades without complaint.
Transition Height Planning
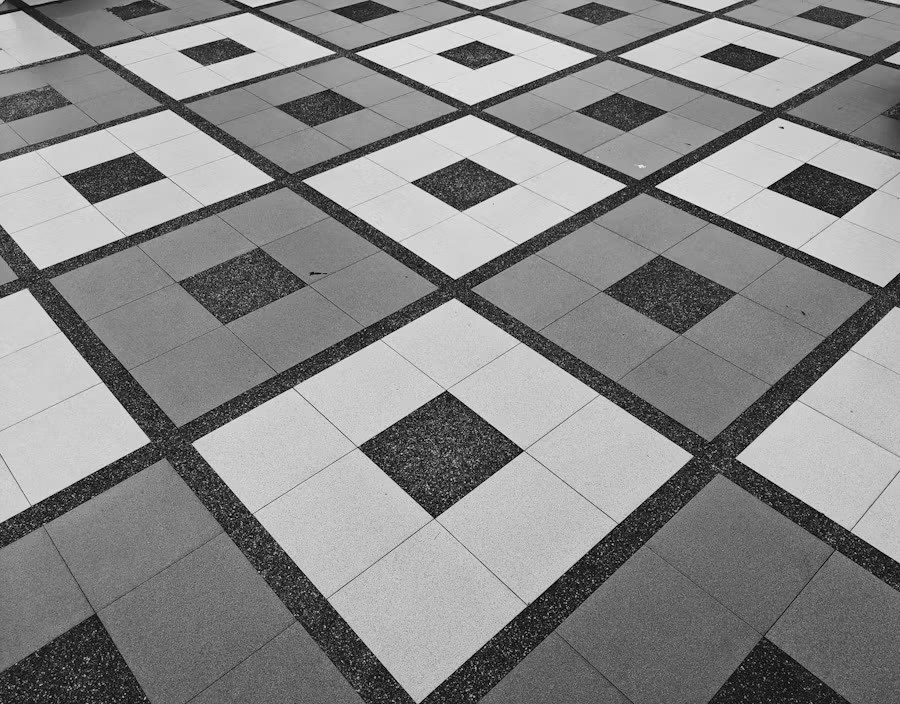
Tile sits higher than carpet once you account for the tile itself, thinset mortar, and any underlayment or membrane below it — often adding 1/2 inch to 3/4 inch of total height compared to bare subfloor. Experienced crews plan transition strips at doorways in advance, factoring in whether adjoining rooms will stay carpeted, get hardwood, or eventually be tiled too. Getting this wrong means a door that no longer swings clear of the new floor, or a transition threshold that becomes its own tripping hazard.
Crack Isolation and Movement Membranes
Concrete slabs in Florida move — thermal expansion, minor settling, and existing hairline cracks are all normal. A crack isolation membrane installed between the slab and the tile absorbs that small amount of movement so it doesn’t telegraph straight up through the grout lines as a visible crack in the tile itself. This step is invisible once the job is finished, which is exactly why it’s the step corner-cutting installers are most tempted to skip — nobody sees it was missing until the crack shows up eighteen months later.
Sequencing Around Cabinetry and Fixtures
In kitchens and bathrooms, the sequence of carpet removal relative to cabinet or vanity installation matters. Tile installed after cabinetry saves material cost but complicates future cabinet replacement; tile installed under cabinetry costs more material but gives a cleaner, more flexible long-term result. This is a judgment call that depends on the specific renovation scope, and it’s the kind of decision that benefits from a team that has actually run both scenarios dozens of times rather than guessing.
Cost Breakdown: What Carpet Removal Before Tile Actually Runs
Pricing varies by region and scope, but here’s a realistic budget range for the Tampa Bay market in 2026.
- Carpet and pad removal only: roughly $1 to $2 per square foot, or about $150 to $400 for an average 300-square-foot living area, including basic disposal.
- Glue-down carpet removal: $2 to $4 per square foot due to the added scraping labor.
- Subfloor moisture testing: typically $75 to $150 per test location, or often bundled into the estimate for larger jobs.
- Self-leveling underlayment: $2 to $5 per square foot depending on how uneven the existing floor is and how much material is needed.
- Crack isolation membrane: $1 to $2 per square foot for materials and labor combined.
- Debris haul-away: often included, but standalone dumpster or haul fees can run $150 to $350 depending on volume.
All told, a homeowner converting a 1,200-square-foot home from carpet to tile should budget somewhere between $2,500 and $5,500 just for demo, subfloor prep, and disposal — before the tile material and installation labor are even factored in. That’s a wide range, and the honest answer for why is that hidden subfloor conditions (moisture, cracks, old adhesive) are impossible to price precisely until the carpet actually comes up. Any estimate that promises an exact number sight unseen is guessing.
Common Mistakes to Avoid
These are the errors that show up again and again in homes where someone tried to save money on the prep phase, or hired a crew that didn’t take it seriously.
- Skipping the moisture test. Setting tile on a slab that hasn’t been checked is gambling with a floor that might fail within a year. It’s one of the most preventable and most common causes of tile popping loose in Florida homes.
- Leaving tack strips or staples behind. A few missed staples might seem trivial, but they create high points that telegraph straight through thinset and show up as tiny bumps under the finished tile.
- Ignoring squeaks and soft spots. A squeaky subfloor before tile goes down is a squeaky, cracking tile floor after. These issues need to be addressed — fasteners re-set, damaged plywood sistered or replaced — before leveling compound goes on top.
- Assuming all subfloors are level enough already. Even floors that look flat to the eye routinely fail the 1/8-inch-per-10-foot standard. Skipping the leveling step to save a few hundred dollars is one of the most common causes of a callback.
- Rushing the DIY demo and damaging the subfloor. Aggressive scraping with the wrong tool can gouge plywood or chip concrete, creating repair work that costs more than it would have to hire it out from the start.
- Not planning for disposal volume. Homeowners are frequently surprised at how much carpet weighs and how quickly it fills a standard trash pickup’s limits, leading to piles of carpet sitting in the garage for weeks.
Why Tampa Bay Homeowners Choose to Have This Done Right the First Time
Every one of the issues above is preventable with the right sequence and the right eyes on the job. This is the part of the process where tampa bay floors genuinely earns its reputation locally — the crews don’t treat demo as a throwaway step before the “real” work starts. Moisture testing gets done on slab jobs as standard practice, not as an upsell. Subfloor deflection gets checked on elevated homes before anyone talks about tile pattern or grout color. That sequencing, done consistently across hundreds of Tampa Bay area homes, is exactly why the finished tile holds up in a climate that’s genuinely tough on flooring — humidity swings, slab moisture, seasonal expansion, all of it.
What also stands out is the disposal side, which homeowners rarely think to ask about until it’s their problem. Full-service carpet removal means the crew hauls out the padding, the tack strips, and the old carpet the same day, rather than leaving a homeowner to figure out bulk trash pickup on their own. It’s a small thing on paper, but it’s the kind of detail that tells you whether a company is thinking about the whole project or just the parts that show up in the “after” photos.
Frequently Asked Questions
Can I remove the carpet myself and just hire someone for the tile installation?
You can, and plenty of homeowners do it to save on labor cost. The caveat is that subfloor inspection needs to happen immediately after, ideally by the installer who will actually be setting the tile, so any moisture, leveling, or damage issues get caught before tile day rather than discovered mid-installation.
How long does carpet removal take before tile installation can begin?
For an average single room, demo alone typically takes half a day to a full day depending on whether the carpet is glued down. Add another one to three days if moisture mitigation or self-leveling compound is needed, since leveling compound needs curing time before tile can be set on top of it.
Will removing carpet reveal problems I didn’t know I had?
Often, yes. Pet stains, subtle water damage, old repairs, and squeaky spots are extremely common discoveries once carpet and padding come up. This isn’t a reason to worry — it’s actually the entire point of doing proper carpet removal before tile installation, since these issues are far cheaper and easier to fix now than after tile is already down.
Is it more expensive to remove glue-down carpet than stretched carpet?
Yes, noticeably. Glue-down carpet requires mechanical scraping to fully clear adhesive residue from the slab, which roughly doubles the labor time and cost compared to standard tack-strip carpet removal.

Do I need a moisture test if my home is only a few years old?
It’s still worth doing. Newer construction can still have elevated slab moisture, particularly if the home was built during Florida’s rainy season or if a vapor barrier wasn’t installed correctly beneath the slab. A moisture test is inexpensive relative to the cost of redoing a failed tile floor.